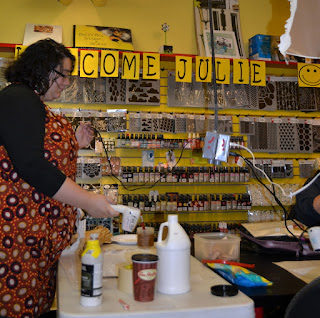
 |
| Julie using the world's quietest heat gun (made by Ranger) |
We layered lots of goodies on our pages, using gesso, paint, ink and stamps and Adirondack color washes in assorted shades. The really cool thing about these washes is that we could spray them on the stencil to create a design, paint over them with a wet brush and while the stencil design would remain, we would also get a wash of colour (which you can control by the amount of water you add). It made for a really neat effect, as you can see here on one of my pages in the early stage of its creation:
And here's Anne with a foot shape she made (by accident) by adding just a little bit of water to a stencilled page:
We also used foam stamps from Claudine Hellmuth's Studio line, including this shape from the "Bloom" collection that I absolutely fell in love with, as shown on a page made by one of my tablemates, Susan, that I thought was pretty awesome:
Julie is a lot of fun as a teacher. She told us right at the beginning of class that she only had two rules: (1) that we had to be comfortable with swearing because, as she said, she swears like a sailor, and (2) we could do whatever the f*@& we wanted! She also explained that we were going to be using some messy techniques so anyone that liked to work very carefully and precisely would need to learn to let go of some of that control (luckily, the supply list provided before class had suggested we bring an apron!). Some people had a little trouble with that concept at first but everyone quickly got the hang of things and the end results were pretty awesome.
One of the most amazing things that I learned and one that really surprised me is that Julie doesn't clean her stencils . They started out all clean and white, like this:
and by the end of the day, they looked like this:
Clearly, the woman knows what she is talking about, because I loved the effects that we got from using a stencil that was still wet from a previous use. It creates a really cool and often distressed looking result and you get some unusual mixes of colours that you would not otherwise achieve.
Another thing that I really liked was the fact that we actually finished the project by the end of the class. I am one of those people that works slower and as a result, I have several unfinished projects from various classes that didn't get done at the time that I just haven't gone back to, which is a darned shame. But in this class, I think all of us were going home with a finished book, or at least one that was assembled. There is lots more that could be added to the pages themselves and that's the whole idea. Julie designed this book to be a travel journal, with pockets for saving ticket stubs, pamphlets and souvenirs from a trip, and lots of space for writing and adding photos.
Here are a couple more pictures of the book I made:
Many thanks to Julie for such a fun and interesting class and to our hosts, Barb (who put on her wobbly headband and gave out candy as well as making sure our day ran smoothly and we had everything we needed)
and Tony (who very kindly hung the rope so we could hang our pages to dry on the "clothesline" and provided us with a delicious lunch of sandwiches, salad and yummy desserts) of Bizzy B.
 |
| Kris, Anne, Susan (behind the pages) and Marilyn |


2 comments:
Green. I'm green with envy. But happy you had such a great time and learned so much great stuff.
Drooling heavily!! Also wondering what DH would think if I hung clothesline in the dining room...?
Post a Comment